Flooring
| « From the U.S. to Germany to China with love | From Hugo to Gatsby » |
With everything in the cottage matching the design details of our main house, why stop with the floor? I love our hardwood floors: they're white oak stained to a light gray, and they're entirely free of grooves that might catch any dirt or (our copious amounts of) cat hair.
Turns out you can only get this kind of finish with a site-finished floor, which was not really a skill I ever intended to acquire. Regardless, off we went.
Sourcing
After much searching I was able to obtain select-grade 3" wide solid white oak from Major Brands Floor Supply. (It's not a trivial product to source as a regular bloke since pretty much nobody is dumb enough to buy and install unfinished solid hardwoods.)
Installation
I cleaned the daylights out of the subfloor, laid down some cheap big box store underlayment, and got to nailing. I rented a flooring nailer from Home Depot and much to my surprise it was actually intensely satisfying to use - the boards just came together. The only downside of rented tools is that the clock's ticking so there's no "eh, I'll just finish it tomorrow".
I kept the first row about a half inch away from the wall framing using shims. I used my 10' piece of Festool track to make sure it was all perfectly straight and top-nailed/face-nailed the wall side of the first course with hand-driven finish nails through pre-drilled holes. I blind-nailed the tongue with a 16ga finish nailer on both the first and second courses since there wasn't yet enough space to get the big flooring nailer in. I face-nailed the final courses with the 16ga finish nailer as well; I was too tired to get precious about the hand-driven finish nails and I doubt they were necessary to begin with.
I developed a method of unpacking a bundle of flooring and sorting them by size. The sticks were evenly divided between being mostly the full length of the bundle, or random shorter lengths. I leaned up a group of the full length sticks on one side of a wall and then arranged the shorter ones in order, measuring and writing their lengths in Sharpie on their undersides. That way when it came time to find the right piece to complete a run it was easy to locate the most optimal cuts. I think I ended up with less than three linear feet of off-cuts in total (for a ~90sqft project), plus of course a number of untouched sticks.
Here's what I had after installing the flooring and spreading wood filler over any gaps.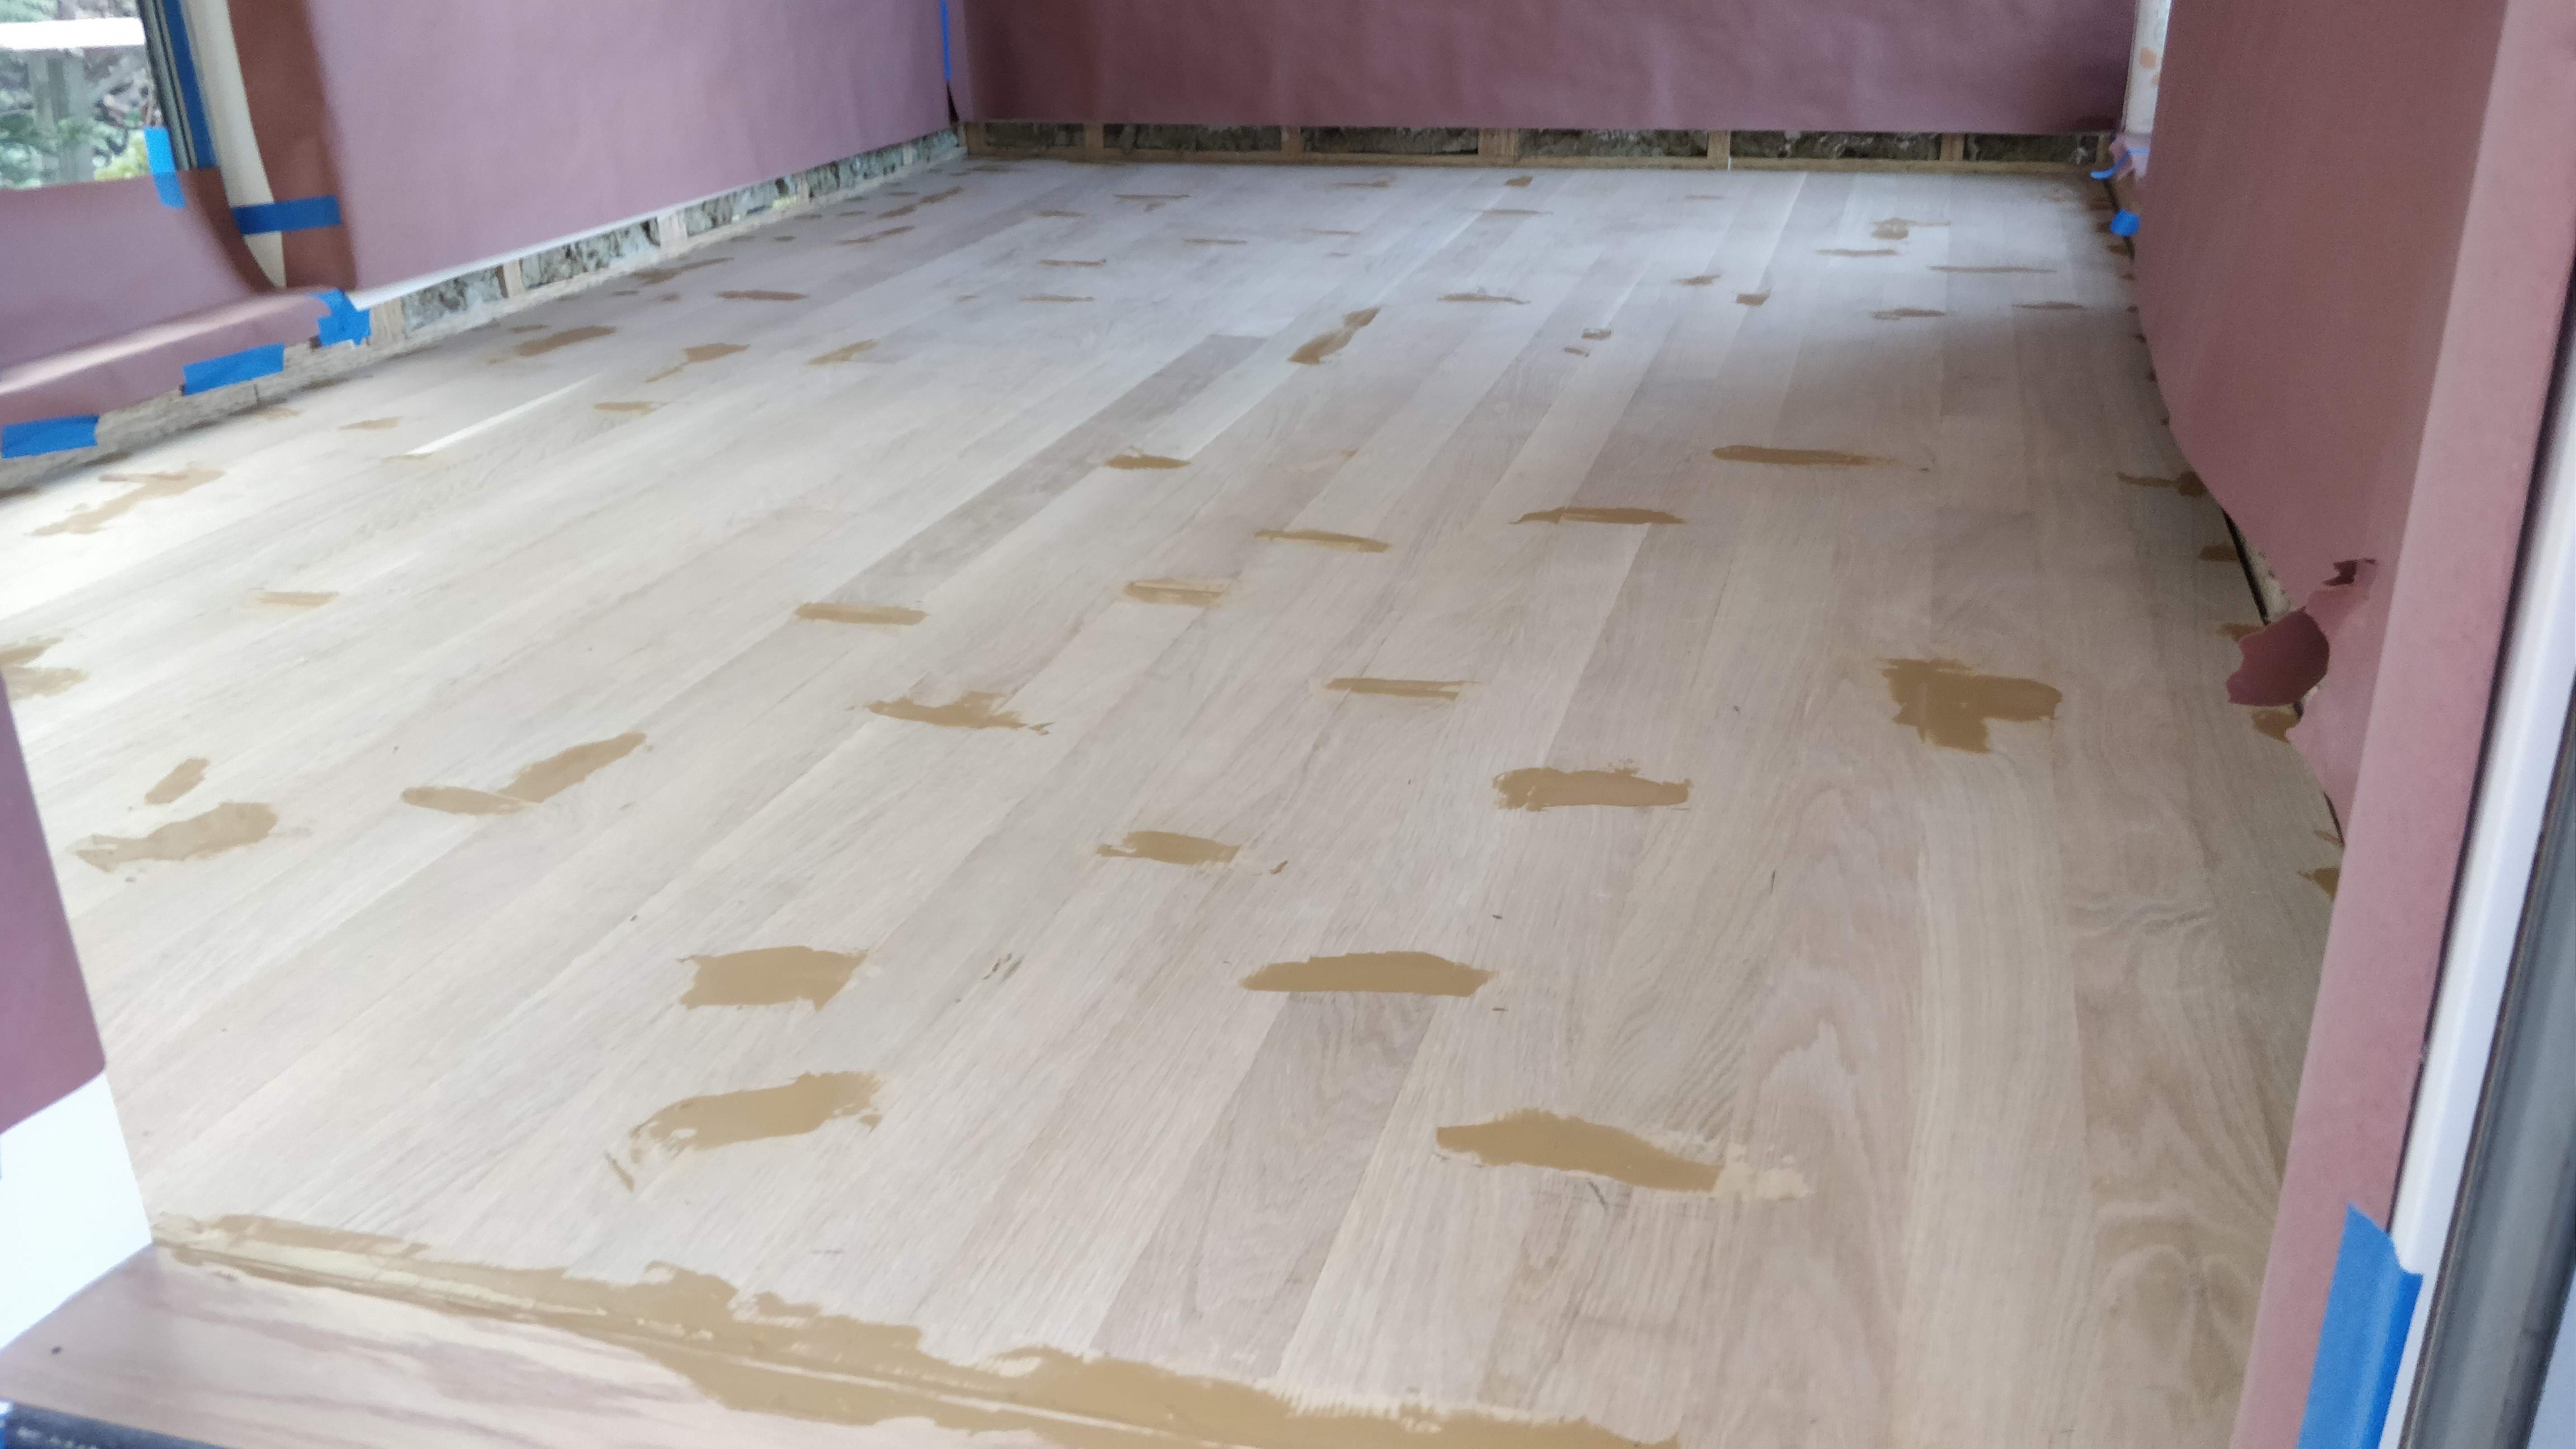
The next two days I groaned loudly anytime I sat down on anything - all the muscles from my knees to my chest were just completely done with moving after a day of constant crouching/standing/crouching/... for the install.
Finishing (part one)
The hardware installer for our house was kind enough to leave behind a gallon of the stain they'd used, which was DuraSeal QuickCoat with a custom blend of 50:50 white:neutral.
Based on already having this stain and generally hating big box store finishes (e.g. the door finishing disaster) I decided to spend the money and fully buy into the pro-grade DuraSeal products. I got their trowelable wood filler color-matched to white oak, their DuraClear Sealer, and DuraClear Finish in satin. I ordered them from FloorMechanics.com along with a DuraTool floor trim pad and refills. These all turned out to be excellent choices.
The trowelable wood filler went on like a dream and cured easily within a day. I spread it liberally, including on many of the short edge joints - somehow these tended to be less tight than the long side joints.
Sanding
This turned out to be the worst part of the project. I rented an orbital floor sander from Home Depot and was given the option of getting sanding pads in 36 grit, 60 grit, 80 grit, and 100 grit. The 36 grit looked absurd and the internet said I'd pretty much only needed to start at 80 for a freshly laid floor, so off I went, optimistic four hour sander rental in tow.
Well, never trust the internet (except this site). The 80 grit was making no progress, so I went back for the 60 grit. After some time, even the 60 grit wasn't making the progress I wanted to see.
The wood filler on the short edge joints turned out to be a great revealer of height differences between boards, and I used that as my guide for ensuring that everything had been properly sanded. (Could I have just not filled those gaps? Sure, but then I wouldn't have noticed (as easily) that there were still height differences, i.e. some boards handed been fully sanded yet, which would have left differences in stain take-up, and that would have wrecked the project.)
So I gave up on the four hour rental period, went to the Home Depot for the third time that day, got the 36 grit disks, and finished up the project. Yikes.
Then I vacuumed. forever.
Finishing (part two)
I configured the stoop in front of the door as a sort of clean room changing station (again reminiscent of my chip fab college lab class) where I'd change out of my shoes into protective booties.
I followed the directions from the DuraSeal products to a T:
- Sand to 100 grit
- Vacuum. forever.
- Tack up dust with rags lightly soaked in mineral spirits. Wait a day.
- Apply stain after gently inverting the can a few times. Remove excess with rags. Wait half a day.
- Apply stain again after gently inverting the can a few times. Remove excess with rags. Wait half a day.
- Buy more rags.
- Apply stain a third time after finally just stirring the damn thing because it wasn't getting out the right depth of color and I realized that after three years of settling it just really needed a hardy stir. Remove excess with rags. Wait a day.
- Apply sealer coat. Wait four hours.
- Apply second sealer coat. Wait four hours.
- Apply finish coat.
All the finish products just worked wonderfully. Getting to just pour product onto the floor and then spread it all zen-like with the foam pad on a paint stick was surprisingly fun. Vacuuming out the foam pads prior to use ensured that they didn't leave anything behind (again unlike the door finishing disaster earlier), though I think one of my comical eyebrow hairs might have gotten into the finish somewhere.
Should I ever have to or get to finish a floor again (e.g. in theater), these'll be the products I'll use.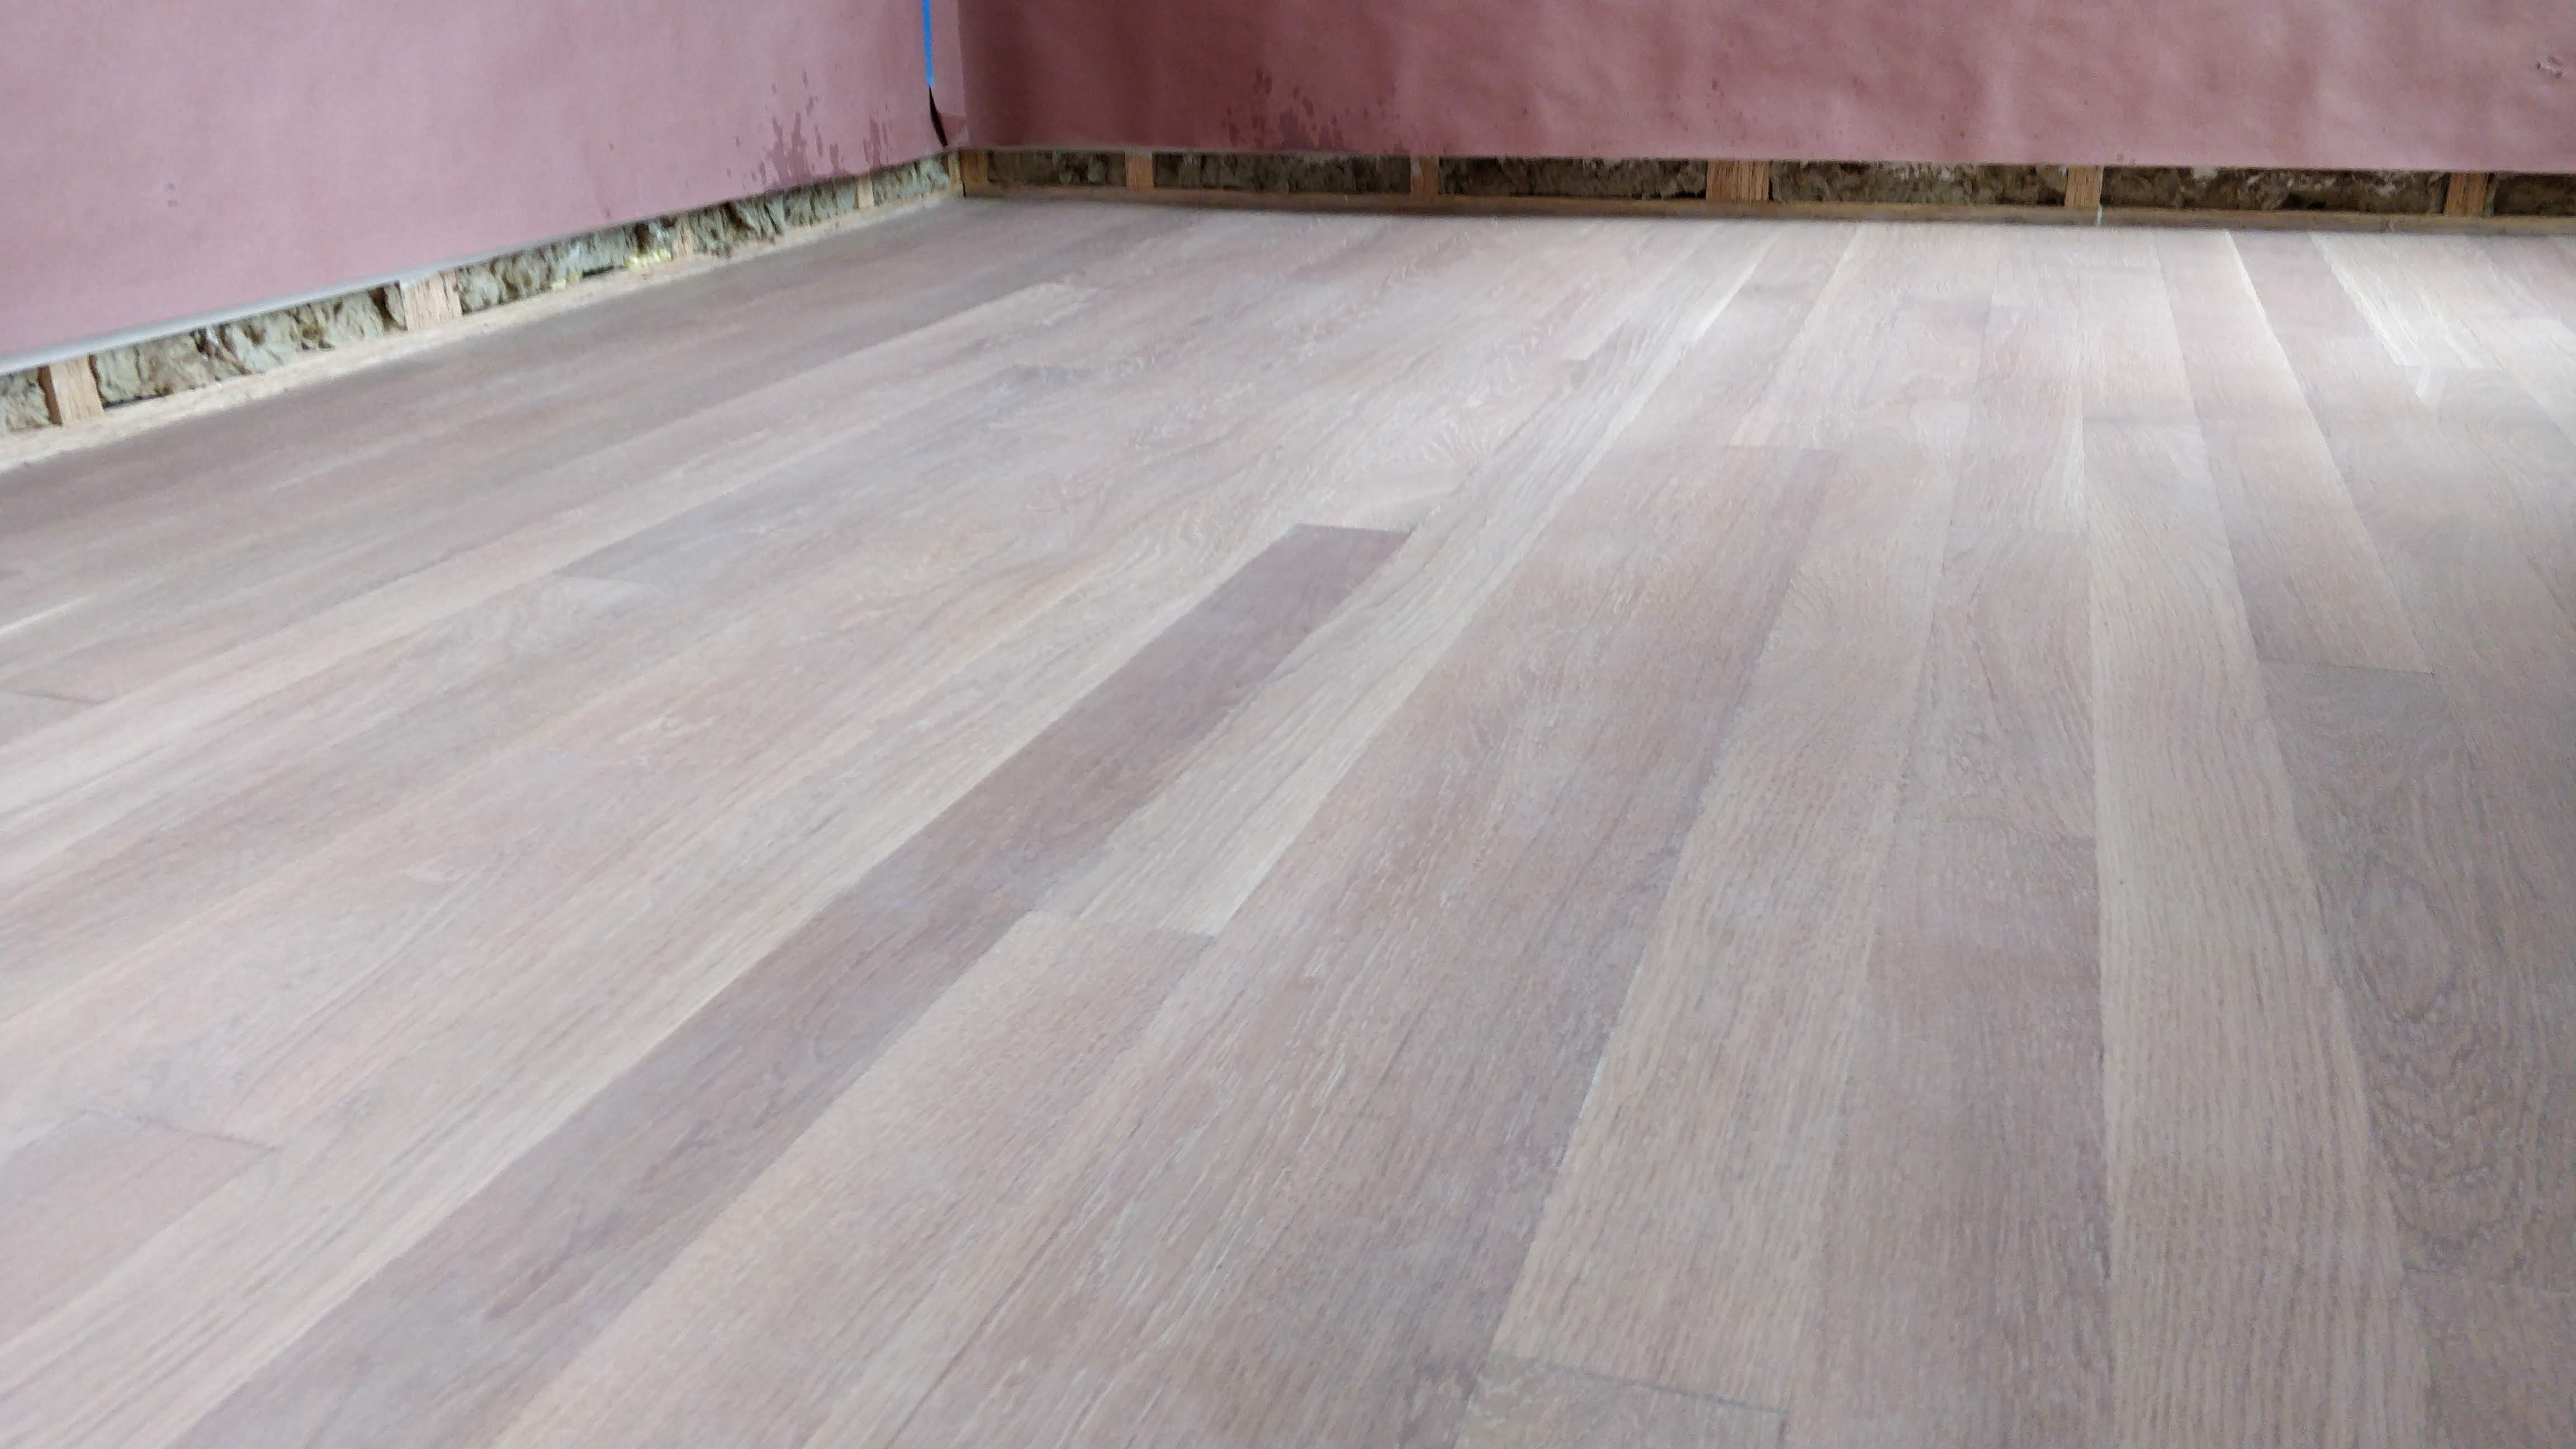
Lessons learned
- Just get all the right tools from the get-go (e.g all the grits of sandpaper) instead of trying to save time and money, since in the end it just ended up costing more of both than doing it right in the first place.
- Pro-grade finishing products and supplies are the bomb.
- Counter-sink any and all face nails carefully before applying the wood filler.
- If your sanding pad gets caught on an un-sunk nail, it's time to get a new sanding pad.
- Liberally use wood filler on short edge joints as an indicator of evenness during sanding.
- The wood filler itself sands quite easily so (unlike with drywall), don't worry about glopping on too much.
- Tape up rosin paper on the walls (since mine were already painted) to guard against dust and finish product spatter.
- It's really helpful to wear dust booties during the finishing stages, but stain etc. will still soak through them. Make sure to remove socks and clean feet prior to tracking excess stain into the main house.
- Learned this the hard way, obviously.
| « From the U.S. to Germany to China with love | From Hugo to Gatsby » |